

Saturday, December 18, 2010
Wednesday, December 1, 2010

Wednesday, November 10, 2010
Magic & Wonder
I got me some of this:
 and used my beloved
 to make this:

So what do you think?? It was rather hard taking a photo of glass! And the glass was kinda scratched up, since I didn't want to use any of my GOOD pieces till I had done some practice -so what you see is my first attempt at etching glass! I had DH cut me a piece of 8x8 from some scrap window panes he had laying around. lol {thanks hun!}
I was sooo worried it didn't work when I was rinsing off the glass after etching it, but voila! Turned out SO cute!
I now have several ideas lined up as Christmas gifts!!!
Would you like the file to create your own? Click here.
Wednesday, November 3, 2010
My new love... gadget love!
Have you heard of this gadget??
You have! Isn't it AWESOME!? Well, I've been playing with it lots since my dearest, most wonderful hubby got it for me as an early Christmas gift!! {Isn't he the bestest??}
Ever since they came out with the new Silhouette Studio, I've been hesitant on using my good stash to cut because there were many bugs on that new software. BUT! There's been many updates since it first came out and I am happy to say that I am loving Silhouette Studio LOTS!
Sadly, I haven't had the chance to try the heat transfer, etched glass and rhinestones {financial woes!} feature, but I have been cutting vinyl and cardstock and it's SOO cool!!
I've managed to come up with a few cute designs that I wanted to share. Took me a while {ok, days!} to figure out how to design and convert image files using the programs I love (PhotoShop and Illustrator) and then convert the file so it WORKS with Silhouette Studio. Sooo here's a few I am sharing with you -yes, you can download them! They are Silhouette Studio files only {sorry!}.

 I thought this one would look so cute on a onesie! I hope to get some heat transfer vinyl soon so I can try my hand at it!! Download here.
Ever since they came out with the new Silhouette Studio, I've been hesitant on using my good stash to cut because there were many bugs on that new software. BUT! There's been many updates since it first came out and I am happy to say that I am loving Silhouette Studio LOTS!
Sadly, I haven't had the chance to try the heat transfer, etched glass and rhinestones {financial woes!} feature, but I have been cutting vinyl and cardstock and it's SOO cool!!
I've managed to come up with a few cute designs that I wanted to share. Took me a while {ok, days!} to figure out how to design and convert image files using the programs I love (PhotoShop and Illustrator) and then convert the file so it WORKS with Silhouette Studio. Sooo here's a few I am sharing with you -yes, you can download them! They are Silhouette Studio files only {sorry!}.

This above is perfect for Christmas :) Download here.


And my final flourish! Cute, eh? Download here.
{This post was not paid for by Silhouette America. In fact, I rather doubt they know who I am!! Just me loving my new gadget and wanting to share designs! Enjoy :)}
Wednesday, October 20, 2010
Battling the Sickies
My poor girls and poor hubby have been pretty miserable these last few days! We've been battling the icky germs that my eldest brought home. Lovely runny nose, snot everywhere, lowgrade fever and an annoying cough. Gotta love it! The eldest is almost over it, the littlest ones are still suffering from a snotty nose and cough and the poor hubby has lost his voice! And somehow I have managed to avoid getting sick even though I am usually the one that has their shirt used as a tissue!
An order for 1 large family bubble, please! Seriously, I hate it when the kids get sick. No fun for anyone!
But before the lovely germs decided to visit, we had some fun times! We went to the zoo to trick or treat. My girl was ecstatic to be able to finally wear her costume! Here is the back:
 Whatcha think of the tail and wings?
Well, I am off to start din-din. Gotta keep on nurs'n my family back to health! :)
An order for 1 large family bubble, please! Seriously, I hate it when the kids get sick. No fun for anyone!
But before the lovely germs decided to visit, we had some fun times! We went to the zoo to trick or treat. My girl was ecstatic to be able to finally wear her costume! Here is the back:

Well, I am off to start din-din. Gotta keep on nurs'n my family back to health! :)
Thursday, October 14, 2010
Monday, October 11, 2010
What a find!
Hubby and I got to go out today --without kids!! Along our journey we came across this:
 isn't it PERFECT? It goes so well with the Halloween costume I put together for my girl! I just had to splurge on it. :)

Thursday, October 7, 2010
Halloween Costume
So my daughter comes to me and says to me that she finally knows what she wants to be for Halloween! She would like to be --wait for it-- a Fairy Princess Kitty-Cat.
Right. Suuurrre. Not a problem, kid! Do they even sell such a costume??? Mmmhmmm Sure, they do! Right next to the Ninja Fairy Dinosaur costume.
Sooo I decided to tackle this one myself. My daughter is VERY into dress-up clothes, so all previous Halloween costumes end up becoming a regular dress-up clothes after, so I never felt bad about buying her costume. I knew she'd make great use of it. In fact, the actual kitty costume we got her three years back is still worn to this day! Granted, the tutu is teeny on her -she must wear pants under!! and the tail is kinda shaggy.. but it is oh so loved! So I figured if I did come up with something, I had to make sure it would last and perhaps even be an upgrade to her itty bitty kitty costume.
So we started out with a pettiskirt that we have. Then I found an old garage sale shirt that we got her last year. It had a slight stain, but I could work with it and get it covered. And then my daughter remembered she had a leopard print tights. Granted, they are three sizes too small but she was so excited about them that I told her I'd make it work -somehow.
So off to Hobby Lobby I went to find some supplies to help me. I got some marabou, some felt fabric that had hot pink leopard print on it and some faux fur fabric with leopard print. I priced ribbons at Hobby Lobby and noticed that RABOM had more ribbon quanity for less money PLUS they had free shipping that weekend, so I ordered some leopard print ribbons in pink and ivory, some hot pink sheer ribbon, and brown satin ribbon. I also added a foam headband to my cart and a plastic headband since I wasn't sure which one I'd like best to use for the ears.
When all the supplies arrived, I got to work! I ended up using the foam headband. I covered it with the brown satin ribbon, using the glue gun to adhere it. I then cut out the faux fur into triangle pieces, inserted floral wire in the ear and then glued it shut. The floral wire helped me shape the ears. I then attached the ears to the back of the satin covered ribbon and voila! I also added a touch of marabou between the ears. Sooo cute! My daughter is in love with the ears!!!
The shirt was pretty easy, too. I cut out the hot pink leopard felt fabric and added an itty bitty bit of hot glue around the edge of the fabric and glued it to the shirt. I added some wax paper in between the shirt before attempting to glue the fabric on. I was afraid I'd end up gluing the back and front of the shirt together LOL now, that wouldn't be such a good thing to have happen, eh?
I added some marabou to the cuff of the shirt and around the neck. It looked so darling!!! We also ended up sewing the marabou tail to the back of the shirt. Since she wasn't wearing it tucked it, it worked well. Plus, then we didn't have to ruin our pretty pettiskirt and it could be reused without the kitty attire. I used embroidery floss and hand sewed the marabou to the shirt. Really easy!
Now what's a Fairy Princess Kitty-Cat without a magic wand?? My girl had painted a wooden star wand a loong time ago. I had her dig it up and got her permission to alter it to match her new costume. She totally agreed! I painted the stick portion brown and the star pink. Then I traced the star on the hot pink leopard print fabric twice, cut the fabric and then sprayed it with my Elmer's multi-purpose spray adhesive. I love that it allowed for repositioning it! I got it just right after a couple of tries and it was perfect!! Then I tied several ribbons around it, added also tulle to it and put a dab of hot glue to ensure the ribbon and tulle don't come off! A Fairy Princess Kitty-Cat does a lot of magic and we wouldn't want that wand coming apart!!
Now to tackle the too small tights. I cut off the feet and top portion.. I then hemmed the bottom and tops of both and voila! I now had leopard print leggings. Sooo cute! So there ya have it:

Now the final touch would be the wings! Which is not depicted in the picture, but I can assure you that her pink set of wings from LAST year's fairy costume matches perfectly and she will be wearing that along with the costume I made her :) Sooo soooo cute!! My girl absolutely adores her Fairy Princess Kitty-Cat costume and that is all that matters to me!!
Friday, September 17, 2010
Sweet 16 Party Plans
My cousin will be 16 this month and had turned to me for some party theme ideas. First thing I did was ask her what she liked, what colors, what stuff she enjoyed. After getting some feedback, I went online and started doing some searching. I came across a few ideas but the one my cousin seemed to really like was the following. Oh, I should also mention that it ended up being the same theme design as her bedroom --without my knowing! (I haven't been to their place yet, so no idea!)


I also went ahead and designed her invitation:

She is totally going with this theme and I can't wait to see how it turns out!!! I love party planning, don't you? :)
Tuesday, September 14, 2010
Cakeballs With a Twist
Cakeballs are all the rage. Traditionally you bake a cake, crumble it up, add a frosting to it, roll into balls and refrigerate (or freeze if you're as impatient as I) and voila! YUMMY!
Before I even knew what a cakeball was, I had a recipe that was passed down to me from my mother who got it from her mother... it was a recipe to simply not waste leftover cakes and cookies.
My mother would gather leftover cakes from after the holiday hoopla and would mash it all up, she'd also add teabiscuits or cookies she had lying around and crumble them, too, and add it to the mishmash in her big bowl. She'd stir it all up and then go prepare the chocolate. She'd get some baking chocolate, some butter, sugar, coffee, add a little chocolate liquor, or irish creme` liquor or somesuch to the mix and stir it in a double boiler until it was all melted. Then she'd pour the hot mixture over the crumbly mishmash in her big bowl, mix it all up and add a wee bit of water if there was any need. She'd roll some into balls and sometimes make long logs. She'd top it off with coconut shaving and refrigerate. Delish!!
It has a vastly different taste than the traditional cakeballs we see everywhere. I used to make it for the holidays but didn't know what to call it lol my mother had no name it for it, either. It was simply a recipe that was used to not waste food! How ingenious, huh?
 I'll give you the recipe but honestly, I eyeball it and add a wee bit more of this or that... here's a rough idea of what is added:
And there ya go! Easy peasy! I've called it rum balls, irish creme` balls lol Honestly never thought to call it cakeballs, but I guess technically that is what they are -cakeballs with a twist!
If you repost this recipe please give credit where credit is due and link to my blog, please. Thank ye kindly! :)
Before I even knew what a cakeball was, I had a recipe that was passed down to me from my mother who got it from her mother... it was a recipe to simply not waste leftover cakes and cookies.
My mother would gather leftover cakes from after the holiday hoopla and would mash it all up, she'd also add teabiscuits or cookies she had lying around and crumble them, too, and add it to the mishmash in her big bowl. She'd stir it all up and then go prepare the chocolate. She'd get some baking chocolate, some butter, sugar, coffee, add a little chocolate liquor, or irish creme` liquor or somesuch to the mix and stir it in a double boiler until it was all melted. Then she'd pour the hot mixture over the crumbly mishmash in her big bowl, mix it all up and add a wee bit of water if there was any need. She'd roll some into balls and sometimes make long logs. She'd top it off with coconut shaving and refrigerate. Delish!!
It has a vastly different taste than the traditional cakeballs we see everywhere. I used to make it for the holidays but didn't know what to call it lol my mother had no name it for it, either. It was simply a recipe that was used to not waste food! How ingenious, huh?

- About 1/2 a bar of baking chocolate (I break off about 4 pieces usually)
- 1/4 cup of sugar
- 1 stick of butter
- 3/4 cup of instant coffee
And there ya go! Easy peasy! I've called it rum balls, irish creme` balls lol Honestly never thought to call it cakeballs, but I guess technically that is what they are -cakeballs with a twist!
If you repost this recipe please give credit where credit is due and link to my blog, please. Thank ye kindly! :)
Monday, September 13, 2010
Birds of a feather..
I love birds.
I love vintage birds.
Soo combine the two and I give you:
 I needed a piece for my living room redo that I could use as inspiration. Granted, I'm a long way from actually redoing my living room, but this will be a treasured piece that will help with it when I am ready.
I had lots of fun doing this and it was easy peasy to do! I used an 8x8 piece of wood that I had lying around from a previous project. I then asked my daughter if I could rip out two pages from her coloring book that she didn't like. She kindly obliged. I glued the coloring pages, overlapping them and tucking them in the back neatly. I then used my good friend, Gesso, to prime the piece for my acrylic paints.
I used so many colors.. a tannish color as the base, let it dry, then a white, let it dry, then sanded it lightly, then a mix of blues and greens, sanded it again.. used some Crackle to give it a worn aged look, then sanded again.. and then just to throw in a bit of fun, I painted on some Sparkle Glaze (by Delta Ceramcoat) to give it a soft iridescent look. And voila! That's how I got the piece to look perfect for me!
Now I needed my finishing touch, the vintage bird. I found so many AMAZING vintage pieces here. LOVE that site! I printed my lovely bird and adhered it to the center of my piece and voila! I give you my work of art. :)
I love vintage birds.
Soo combine the two and I give you:

I had lots of fun doing this and it was easy peasy to do! I used an 8x8 piece of wood that I had lying around from a previous project. I then asked my daughter if I could rip out two pages from her coloring book that she didn't like. She kindly obliged. I glued the coloring pages, overlapping them and tucking them in the back neatly. I then used my good friend, Gesso, to prime the piece for my acrylic paints.
I used so many colors.. a tannish color as the base, let it dry, then a white, let it dry, then sanded it lightly, then a mix of blues and greens, sanded it again.. used some Crackle to give it a worn aged look, then sanded again.. and then just to throw in a bit of fun, I painted on some Sparkle Glaze (by Delta Ceramcoat) to give it a soft iridescent look. And voila! That's how I got the piece to look perfect for me!
Now I needed my finishing touch, the vintage bird. I found so many AMAZING vintage pieces here. LOVE that site! I printed my lovely bird and adhered it to the center of my piece and voila! I give you my work of art. :)
Sunday, September 12, 2010
Honey bars

Here's the recipe:
Honey bars:
3/4 c. oil 2 c. flour
1/4 c. honey 1/2 tsp. baking soda
1 c. sugar 1/2 tsp. salt
1 egg 1 tsp. cinnamon
Icing:
1 c. powdered sugar
1 tsp. vanilla
A few drops of milk
Directions:
Mix the oil, honey, sugar and eggs together. Set aside, and mix the flour, baking soda, salt and cinnamon separately. Add dry ingredients to the first mixture. Mix well (it will be thick). Spread into a greased pan (I use a half-cookie sheet), and bake at 325 degrees for 15-18 minutes. Mix icing ingredients together; the consistency shouldn't be too thick, but not too runny either. I add the milk 1/4 tsp. at a time while stirring until I get it right. Ice while warm. Cut into squares after it has cooled.
Easy peasy and absolutely delish!
Found the post with the original recipe! Credit for recipe here.
Friday, September 10, 2010
Pettiskirts (and a slight mention of Halloween)
Halloween is around the corner. And although it isn't one of my favorite holidays and I do not decorate for this ghoulish time of year, my daughter really enjoys it and so we do participate in the whole costume and trick or treating bit.
This year my daughter has decided she wants to be a princess fairy kitty cat. Uhmmm not having very much luck finding such a costume. Sooo we've decided to make one with what we've got! She's got a gorgeous pettiskirt that I got for uber cheap (more on this in a bit) and I figured I could probably make this work somehow. I am thinking marabou would work well for a tail and I can figure out the rest. So, wish me luck on this endeavor!! I've never actually made a Halloween costume. We usually take the easy route and just buy whatever.
Now, in regards to this pettiskirt. I just have to get on my soapbox for a moment and say the following: DO YOUR RESEARCH, BE A SMART BUYER! I cannot stress this enough. Here's my story:
 A few months back I was checking out Etsy to buy pettiskirts for my girls. I thought it'd make such a cute photoshoot! I was in utter shock at the prices... anywhere from 50 to 60 bucks PER pettiskirt. Yowsa! There was absolutely no way I would shell out THAT much for three pettis.
I finally did come across an Etsy buyer who said she'd make a 'good' deal for me and I ended up purchasing her handmade pettis for about 65. I figured three for what seemed to be the going rate for one, that's gotta be a GREAT deal, right? W R O N G !
Took about a week for her to "sew" my pettis and then I get a box in the mail from a totally different state than where the seller resided in. Apparently she had drop-shipped the item and it came directly from a wholesaler. The company had blackened out their info but it could still be made out. And the pettiskirts had a label saying "Made in China."
Boy was I furious! She claimed to be sewing my pettis and you cannot sell non-handmade items (unless it's supplies) on Etsy. I had been had. Sigh.
So I confront this seller... she denies, denies, denies... she says she had a lot of work orders and had given my order to her 'seamstress' to complete. She said she would investigate the issue. She never investigated, she never did nothing. I did get a full refund for my purchase and she got banned from Etsy. And yes, I did send back the pettis. I didn't want any part of her business or anything. She promised to get back to me with what she found out, but I never heard from her again. Go figger. She never came out and admitted what she had done, but it was obvious and I had tons of proof against her.
BUT, on the bright side of all this? I had found an AMAZING wholesaler that sells to peeps like you and me and for VERY good prices!
The reason I had decided to mention what had happened to me is because recently I hopped on over to a blog I visit daily and I saw a sponsor on there carrying the EXACT SAME petti that I spent 20some bucks on (60some for three) and this seller is selling it for about the same (give or take a few dollars). And this exact same petti can be purchased at the wholesaler I came across for SO much cheaper (nine bucks, last I checked!).
Now let me just say, I have ZERO issue with resellers. If you can make money as a reseller, good for you!!! If you are being upfront and honest with your customers that you aren't the one actually sewing the pettis and are stating that you are indeed a reseller, totally OKAY! What I am saying is, as a buyer, we must do our research and see if we are getting our items at a good deal. Because trust me, if you do the leg-work and look around, you can and will find most of these items for far cheaper when purchased directly from the wholesaler.
So here is where I share with you this AMAZING wholesaler. They get tons of large shipments directly from China, so yes, you do have to accept that itty bitty bit. BUT, they do have all certificates available stating that they follow CPSIA testing, etc. so at least you are assured that the item is OK. All certificates are available right on their site so you can check every single one out and be assured of this. Oh, and they have more than just pettiskirts and tutus and sets. They have flower clips, and headbands and so many more awesome and cool items! And you don't have to have a minimum order or buy in bulk, which is VERY nice. These items are neat ideas for birthday parties and such! I got a bunch of cute clips for my daughters for mere dollars! Soooo if you want to check them out, click here. :)
This year my daughter has decided she wants to be a princess fairy kitty cat. Uhmmm not having very much luck finding such a costume. Sooo we've decided to make one with what we've got! She's got a gorgeous pettiskirt that I got for uber cheap (more on this in a bit) and I figured I could probably make this work somehow. I am thinking marabou would work well for a tail and I can figure out the rest. So, wish me luck on this endeavor!! I've never actually made a Halloween costume. We usually take the easy route and just buy whatever.
Now, in regards to this pettiskirt. I just have to get on my soapbox for a moment and say the following: DO YOUR RESEARCH, BE A SMART BUYER! I cannot stress this enough. Here's my story:

I finally did come across an Etsy buyer who said she'd make a 'good' deal for me and I ended up purchasing her handmade pettis for about 65. I figured three for what seemed to be the going rate for one, that's gotta be a GREAT deal, right? W R O N G !
Took about a week for her to "sew" my pettis and then I get a box in the mail from a totally different state than where the seller resided in. Apparently she had drop-shipped the item and it came directly from a wholesaler. The company had blackened out their info but it could still be made out. And the pettiskirts had a label saying "Made in China."
Boy was I furious! She claimed to be sewing my pettis and you cannot sell non-handmade items (unless it's supplies) on Etsy. I had been had. Sigh.
So I confront this seller... she denies, denies, denies... she says she had a lot of work orders and had given my order to her 'seamstress' to complete. She said she would investigate the issue. She never investigated, she never did nothing. I did get a full refund for my purchase and she got banned from Etsy. And yes, I did send back the pettis. I didn't want any part of her business or anything. She promised to get back to me with what she found out, but I never heard from her again. Go figger. She never came out and admitted what she had done, but it was obvious and I had tons of proof against her.
BUT, on the bright side of all this? I had found an AMAZING wholesaler that sells to peeps like you and me and for VERY good prices!
The reason I had decided to mention what had happened to me is because recently I hopped on over to a blog I visit daily and I saw a sponsor on there carrying the EXACT SAME petti that I spent 20some bucks on (60some for three) and this seller is selling it for about the same (give or take a few dollars). And this exact same petti can be purchased at the wholesaler I came across for SO much cheaper (nine bucks, last I checked!).
Now let me just say, I have ZERO issue with resellers. If you can make money as a reseller, good for you!!! If you are being upfront and honest with your customers that you aren't the one actually sewing the pettis and are stating that you are indeed a reseller, totally OKAY! What I am saying is, as a buyer, we must do our research and see if we are getting our items at a good deal. Because trust me, if you do the leg-work and look around, you can and will find most of these items for far cheaper when purchased directly from the wholesaler.
So here is where I share with you this AMAZING wholesaler. They get tons of large shipments directly from China, so yes, you do have to accept that itty bitty bit. BUT, they do have all certificates available stating that they follow CPSIA testing, etc. so at least you are assured that the item is OK. All certificates are available right on their site so you can check every single one out and be assured of this. Oh, and they have more than just pettiskirts and tutus and sets. They have flower clips, and headbands and so many more awesome and cool items! And you don't have to have a minimum order or buy in bulk, which is VERY nice. These items are neat ideas for birthday parties and such! I got a bunch of cute clips for my daughters for mere dollars! Soooo if you want to check them out, click here. :)
Wednesday, September 8, 2010
Strawberry Cake
My daughter was getting tired of the same'ol same, I guess, so she asked that I make her a stawberry cake for her birthday. Suuure honey, I said! And off I went searching high and low for a cake like that.

I came across one I really liked and it has over 200 positive reviews. Must be good then, right? Right. So here is the recipe, however, some changes were made so here is the recipe I followed:
Ingredients:
• 2 cups white sugar
• 1 (3 ounce) package strawberry flavored gelatin
• 1 cup butter, softened
• 4 eggs (room temperature)
• 2 3/4 cups sifted cake flour
• 2 1/2 teaspoons baking powder
• 1 cup whole milk, room temperature
• 1 tablespoon vanilla extract
• 1/2 cup strawberry jelly (we used smuckers brand)
Directions:
1. Preheat the oven to 350 degrees F (175 degrees C). Grease and flour two 9 inch round cake pans.
2. In a large bowl, cream together the butter, sugar and dry strawberry gelatin until light and fluffy. SEPARATE the whites and yolks… add only the yolks, mix well.
3. Whipped the whites into soft peaks and folded them in at the end.
4. Combine the flour and baking powder; stir into the batter alternately with the milk. Blend in vanilla and strawberry jelly. Divide the batter evenly between the prepared pans.
5. Bake for 25 to 30 minutes in the preheated oven, or until a small knife inserted into the center of the cake comes out clean. Allow cakes to cool in their pans over a wire rack for at least 10 minutes, before tapping out to cool completely.
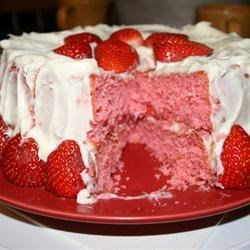
I love how you can put chocolate frosting, or serve with vanilla ice cream. So versatile! And it really truly tasted very strawberry-tastic!
Original recipe can be found here. Photo taken from allrecipes.com where the original recipe is found.
I came across one I really liked and it has over 200 positive reviews. Must be good then, right? Right. So here is the recipe, however, some changes were made so here is the recipe I followed:
Ingredients:
• 2 cups white sugar
• 1 (3 ounce) package strawberry flavored gelatin
• 1 cup butter, softened
• 4 eggs (room temperature)
• 2 3/4 cups sifted cake flour
• 2 1/2 teaspoons baking powder
• 1 cup whole milk, room temperature
• 1 tablespoon vanilla extract
• 1/2 cup strawberry jelly (we used smuckers brand)
Directions:
1. Preheat the oven to 350 degrees F (175 degrees C). Grease and flour two 9 inch round cake pans.
2. In a large bowl, cream together the butter, sugar and dry strawberry gelatin until light and fluffy. SEPARATE the whites and yolks… add only the yolks, mix well.
3. Whipped the whites into soft peaks and folded them in at the end.
4. Combine the flour and baking powder; stir into the batter alternately with the milk. Blend in vanilla and strawberry jelly. Divide the batter evenly between the prepared pans.
5. Bake for 25 to 30 minutes in the preheated oven, or until a small knife inserted into the center of the cake comes out clean. Allow cakes to cool in their pans over a wire rack for at least 10 minutes, before tapping out to cool completely.
I love how you can put chocolate frosting, or serve with vanilla ice cream. So versatile! And it really truly tasted very strawberry-tastic!
Original recipe can be found here. Photo taken from allrecipes.com where the original recipe is found.
Sunday, September 5, 2010
Autumn is in the air
Yep, I'd have to say so!
Finally feeling cool here... what a lovely breath of --ACHOOO! Fresh air and allergies. Snifflesniffle.
Allergies aside, managed to get some of our Autumn decor` out!!

 My wonderful hubby made a very late night run to WalMart last year at the end of the season. We ran out of formula and needed more diapers... he came back home with BAGS of Autumn decor for me! But WAIT! Guess how much he paid for it all?? Everything was a dollar or less! The lady saw him going to check out and told him that everything in the front bin is being reduced to a buck or less and he could have first dibs before they made the announcement to all. This was like 11pm at night and no one was there, so he managed to score some pretty neat stuff for me!
Finally feeling cool here... what a lovely breath of --ACHOOO! Fresh air and allergies. Snifflesniffle.
Allergies aside, managed to get some of our Autumn decor` out!!


Wednesday, September 1, 2010

Sunday, August 29, 2010
Cupcake Stand
Ok, so it isn't the fanciest thing on the block, but I wanted to use supplies I already had on hand. Call me frugal but there was a budget and I was sticking to it! Birthday parties can get mighty costly if you aren't careful... The only thing I bought to put this together was the scrapbook paper which cost 65 cents a piece and I got four sheets. Not bad, huh? :)

I had some foam board lying around from when we had our garage sale, so I had those cut into squares. Big, medium and small. Simple! Got the scrapbook paper I wanted and then looked around my stash of empty containers. Yes, I save containers. They are great to store kid's stuff and can be used for all kinds of artsy crafty stuff. Case in point! So anyway, I wanted something tall because I didn't want the cupcake toppers I made to be smooshed down in the cupcake. So I chose my empty Gerber Puffs container.
I was initially going to wrap the container with red satin ribbon, however it was too much red and I decided I liked how it looked as plain white and it had a really nice shape to it. Easy peasy!
I used hot glue gun to attach the containers to the foam board (make sure to first glue your scrap paper to the foam board before attaching the container! I used my daughter's gluestick because it didn't leave any bumps and it was nice and smooth when dried), however it wasn't very stable so here is where my dear hubby comes in:
 He screwd the caps in to the foam board giving me peace of mind that cupcakes won't be raining down on the table during the party! And it held up REALLY well! (thanks hubby for helping!!!) I should also mention that I glued the lids to the containers, too.
Notice the pencil marks on the foam board? The arrow? I made sure to add arrows under each foam board piece so I'd know which side it was facing. Because I added some ribbon around the foam board, I wanted to make sure I aligned all of the pieces properly and the extra overlapped ribbon in the back was not noticed by anyone. Hope that makes sense!
So here ya have it:
 I took a small gift box I had saved from Christmas, covered it with light green tissue paper and put the cupcake stand on top of it. I loved how it was the centerpiece of the table and how it stood out nice and tall!
After the party I took it apart (with the hubby's help!) and saved it. I can always buy new scrapbook paper and re-assemble it for another party!
Frugal, easy and I think it looked cute!

I had some foam board lying around from when we had our garage sale, so I had those cut into squares. Big, medium and small. Simple! Got the scrapbook paper I wanted and then looked around my stash of empty containers. Yes, I save containers. They are great to store kid's stuff and can be used for all kinds of artsy crafty stuff. Case in point! So anyway, I wanted something tall because I didn't want the cupcake toppers I made to be smooshed down in the cupcake. So I chose my empty Gerber Puffs container.
I was initially going to wrap the container with red satin ribbon, however it was too much red and I decided I liked how it looked as plain white and it had a really nice shape to it. Easy peasy!
I used hot glue gun to attach the containers to the foam board (make sure to first glue your scrap paper to the foam board before attaching the container! I used my daughter's gluestick because it didn't leave any bumps and it was nice and smooth when dried), however it wasn't very stable so here is where my dear hubby comes in:

Notice the pencil marks on the foam board? The arrow? I made sure to add arrows under each foam board piece so I'd know which side it was facing. Because I added some ribbon around the foam board, I wanted to make sure I aligned all of the pieces properly and the extra overlapped ribbon in the back was not noticed by anyone. Hope that makes sense!
So here ya have it:

After the party I took it apart (with the hubby's help!) and saved it. I can always buy new scrapbook paper and re-assemble it for another party!
Frugal, easy and I think it looked cute!
Saturday, August 28, 2010
Some questions answered
I received an email asking about the goodies in my daughter's birthday party. Yes, I did bake just about everything you see there. The hubby gets credit for the ladybug chocolates, though. He had the patience to do those candy mold doodats. I just kept giving the ladybugs a black eye LOL
It took TWO HOURS to dip the pretzels in red and dark chocolate.. my hands were cramping up but they were sooo good and so worth it!!
The lovely 3D ladybug cake topper is from the wonderful Julie over at Cakes and Kids. She is so awesome to work with!!
The birthday cake is from scratch and it's a homemade strawberry flavored cake (daughter requested flavor). May not look purty but it was YUMMY! And there was not a slice left by the time the party ended.
I did cheat on the cupcakes.. that's a butter recipe cake mix, however the chocolate ganache on top I did make. Hubby added a wee bit of Irish creme liqour and it was sooooooooo good!!
Also made the yummy cake pops and dipped them in red candy melt and then added some black sprinkles.
Hubby makes a divine punch!! I'll have to find the recipe for that and share it. It is SOOO good! It was originally a recipe I found online but he has altered it so much that it's nothing like the original I found. It is GOOD!
The decor... yes, I made the cupcake stand. Also designed and printed the birthday banner. You can't quite see it clearly from the pics, but it's got cute little ladybugs flitting around the letters. Designed the cupcake toppers, labels, etc. Also punched out some black dots using my Friskars 1 inch squeeze punch and then just sprinkled it all over the red tablecloth. Super easy and cute!
Can't think of anything else, but feel free to email me with any questions! (...baby's crying so gotta run!)
Saturday, August 14, 2010


Wednesday, August 11, 2010

Only days left...
..till my daughter's birthday party! Eeeek! Going to post pics when all is said and done. Just finished rolling the cake pops. Next, I need to dip them in red candy melts and sprinkle some black sprinkles. That will give it the perfect finished touch! Ten thousand more things to do so I am off! See you in a few days :)
Monday, July 19, 2010

Wednesday, July 14, 2010
Polka dots & my little lady
Been a busy bee here! Well, perhaps more like a busy ladybug. I have been working on my oldest girls birthday party plans! Her party is next month but I am such a planner and always try to get it all planned out waaaay in advance!
Sooo what is the theme, you might ask? Ladybug picnic theme of sorts! Definitely set on ladybug, not so sure the picnic part will work. Still working on 'stuff'!
I'm hoping to have some sneak peeks soon -but that is why I haven't been blogging! Well, that and it's summer and the girls are keeping me busy busy! :)
Sunday, June 6, 2010
More Toppers
Been itching to design so I came up with a few more toppers. A friend is doing a Safari themed party and had asked if I could make some matching toppers for her and I am also sharing it with you!
Please, please keep in mind that the vector images I used for the toppers were found on the web. As far as I was able to tell, they were free to use for personal use. Please do not use these for commercial purposes.
The photos I took are absolutely horrible!! My wonderful Nikon is off at the shop getting repaired so until then I am stuck with a horrible old Kodak camera... quality sucks!!
 In the back you'll also notice the blue birthday topper I offered in my previous post. I decided to print it and use my cool Friskars Squeeze-Punch to show you how it looks! Aren't the fairies adorable? No? Well, it's probably the poor quality photo. They really do look awful cute in person!

 and of course the Safari toppers! I've got the following cute animals: bear, deer, elephant, giraffe, monkey, panda, tiger and zebra.
You can download them here.
red fairy toppers
purple fairy toppers
yellow fairy toppers
safari toppers
Enjoy!
Please, please keep in mind that the vector images I used for the toppers were found on the web. As far as I was able to tell, they were free to use for personal use. Please do not use these for commercial purposes.
The photos I took are absolutely horrible!! My wonderful Nikon is off at the shop getting repaired so until then I am stuck with a horrible old Kodak camera... quality sucks!!


You can download them here.
red fairy toppers
purple fairy toppers
yellow fairy toppers
safari toppers
Enjoy!
Saturday, June 5, 2010
Blue Cupcake Toppers
For a little boy's birthday party...
 You can download the cupcake topper here. For personal use only! Use the XL Seal of Approval puncher to get the scalloped edge I got on my pink toppers. Enjoy!

Friday, June 4, 2010
Whatcha up to, Cupcake?
Cupcakes and more cupcakes! That's what I've been up to! Whew... thank goodness it's over! Although, now that my girls turned one it makes me miss all those itty bitty newborn moments... sigh.
So you wanna see what I did for their birthday? Feast your eyes on the PINK Cupcake themed birthday party!

Yes, everything you see on that table was made by moi! I made the cupcakes, the vanilla-pink and chocolate covered pretzels, the strawberry-fudge cake-ball pops dipped in vanilla chocolate and covered with sprinkles! And I even made the cute pails to hold the cake-ball pops! (more on how I made the pails below!)
My Cupcake Birthday Cake. Yes, I did make it! With the help of hubby, of course ;) Hubby made the chocolate liner... isn't it awesome looking?? ALL edible!
 and the cuppy-cakes, of course:

Yes, I did design and print and punch out those adorable cupcake-toppers on the cupcakes! You can download the cupcake toppers here. Please remember they are for personal use only (not for resale or commercial use! The cupcake image was found online for personal use.) And I used Friskars Squeeze-Punch -XL Seal of Approval.
...............and what's a party without SMASH cakes? Or better yet!!! Cupcake Smash Cakes!
 kept their smash cakes simple! just yellow cake and vanilla frosting. first time they had sugar! and boy are they not getting anymore sweets for a good loooong time! they were SO crabby and on a total googley-eyed sweet-overload state for several hours!

It was OH so fun!! Especially the cleaning up after lol
And the cute pails... oh, how I love the pails!! Lemme show you how I got them to hold the cake-ball pops in place.
First you'll need:
pails (Target had these on sale!!)
tissue paper (color of your choice)
styrofoam
tulle
scissors
 My styrofoam was huge so I grabbed a large shopping bag and set it at my feet and placed the styrofoam in and cut it up into rectangle pieces. It's VERY messy when you cut, hence the shopping bag to catch the mess.
One I had the shapes I wanted cut up, I covered it with my tissue paper (pink in this case) and set it aside.
I cut up some tulle -about 22 inches long. 2 strips for each pail. I set them on the table one strip over the other but in a cross. North to South and West to East position, if that makes any sense.
Then I set my styrofoam covered in tissue paper right in the center, the ends of the tissue paper down. Then pick it up, tulle and all and set it right in the pail like so:
 and tuck the ends of the tulle gently inside as much or as little as you want so it looks like this:
 and there you have it! The pops will now stay in place when you stick'em in your cute pails. :)

So you wanna see what I did for their birthday? Feast your eyes on the PINK Cupcake themed birthday party!

Yes, everything you see on that table was made by moi! I made the cupcakes, the vanilla-pink and chocolate covered pretzels, the strawberry-fudge cake-ball pops dipped in vanilla chocolate and covered with sprinkles! And I even made the cute pails to hold the cake-ball pops! (more on how I made the pails below!)
My Cupcake Birthday Cake. Yes, I did make it! With the help of hubby, of course ;) Hubby made the chocolate liner... isn't it awesome looking?? ALL edible!


Yes, I did design and print and punch out those adorable cupcake-toppers on the cupcakes! You can download the cupcake toppers here. Please remember they are for personal use only (not for resale or commercial use! The cupcake image was found online for personal use.) And I used Friskars Squeeze-Punch -XL Seal of Approval.
...............and what's a party without SMASH cakes? Or better yet!!! Cupcake Smash Cakes!


It was OH so fun!! Especially the cleaning up after lol
And the cute pails... oh, how I love the pails!! Lemme show you how I got them to hold the cake-ball pops in place.
First you'll need:
pails (Target had these on sale!!)
tissue paper (color of your choice)
styrofoam
tulle
scissors

One I had the shapes I wanted cut up, I covered it with my tissue paper (pink in this case) and set it aside.
I cut up some tulle -about 22 inches long. 2 strips for each pail. I set them on the table one strip over the other but in a cross. North to South and West to East position, if that makes any sense.
Then I set my styrofoam covered in tissue paper right in the center, the ends of the tissue paper down. Then pick it up, tulle and all and set it right in the pail like so:


{click pic to enlarge!}
Saturday, May 15, 2010
Garage Sales
Oh, how I love thee! I love garage sales!
So we went to a town nearby that was having a pretty awesome garage sales. Scored some neat stuff! Lotsa miscellaneous fabrics, some beads, gems, neat looking accent, a pillow I am gonna redo (that was free!), hubby got a free monitor and keyboard, tons of clothes for the girls and --a GORGEOUS desk with hutch! Wait till you hear how much I paid for that ---twenty buckeroos! Yes, ladies and gents, just twenty bucks! And it is really really nice.
I plan on painting it, though, so it matches my oldest girls bedroom. Not entirely sure on color yet. I have a mighty large collection of furniture in our garage that needs a fresh coat of paint. I've got a dresser, a desk/hutch, a curio and a lovely side table for the living room... I have got to get my butt into gear and start sanding and painting!
If I don't get those pieces done, I won't be able to go to anymore garage sales... painting here I come!
Tuesday, May 4, 2010
Picture Perfect Gift Ideas
This past holiday season hubby and I decided to make most of our gifts to the family. Yes, we were trying to be frugal but also we wanted to give family something more of a keepsake that was handmade with love. (insert: awwww)
We made several gifts and even got our daughter involved. We printed out 8.5x11 calendars that I plopped photos in a ready made template (purchased at a digistore online) and then laminated it. We took it to our nearest home office store and they bound it for a grand total of 4 buckeroos! It was an absolute hit!! In fact, the guys in the family requested an extra one for their office at work.

My daughter and I worked on magnets. We used bottle caps, a hole punch, E6000, some crystal lacquer and neodymium rare earth magnets (got tons of these for uber cheap at Etsy). We printed several resized photos on a single 4x6 photo paper and managed to make tons of magnets for family! A hit!
Oh! And we made some candles. Yep, used the empty (and cleaned) baby jars of food to pour in the scented wax. Most of our family uses a warmer doodat so we didn't need to add a wick. It was a GREAT hit, too!
But the biggest hit of all was our family photo collage of the girls on an 8x8 piece of wood.
 This was fun to make but I do not recommend doing this in the winter time if you do not have a heated garage! The poly stuff stinks and due to being cold out, it took forever and a year to dry. We ended up enclosing it inside a cabinet, draped a sheet over it and placed a space heater under the sheet to keep it warm enough to dry. No worries! Hubby set up his web cam in the garage so we could keep an eye on it! No fires, promise!
What I love most (and what family loved most) was A -the fact that it was homemade and B -that you could see the wood grains so it almost looked like the photo was actually painted on.
It really is pretty simple to make this. And very forgiving!! All the imperfections look like they were placed there on purpose. I loved that about this project!
And you can get real creative with this! We turned one of these into a clock! We just bought the clock pieces at WalMart. They can be found at any hobby store, though.
Supplies:
Wood -had hubby cut mine into 8x8's. Tip: use LIGHT colored wood. The darker the wood, the harder it will be to see some parts of your photo. It will get lost... I ended up with darker colored wood and hubby ended up bleaching it for me to lighten it because my girls faces were not very clear. If you want to know the process hubby used to bleach my wood, lemme know. That'd be a whole other blog post!
Sandpaper -300 grit and 150 grit
Paint -I used acrylic paints
Your photo of choice resized to fit your wood piece. You can digiscrap a neat layout and use it, too! Totally go crazy! I used PhotoShop to design my prints.
Wipe-on Poly
T-Shirt transfer paper
Iron
Wax paper
Mod Podge (I used gloss)
Well ventilated room
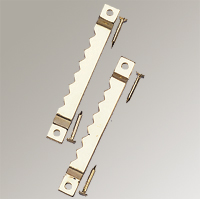
Saw-tooth Hangers (for the back)

Instructions:
We made several gifts and even got our daughter involved. We printed out 8.5x11 calendars that I plopped photos in a ready made template (purchased at a digistore online) and then laminated it. We took it to our nearest home office store and they bound it for a grand total of 4 buckeroos! It was an absolute hit!! In fact, the guys in the family requested an extra one for their office at work.

My daughter and I worked on magnets. We used bottle caps, a hole punch, E6000, some crystal lacquer and neodymium rare earth magnets (got tons of these for uber cheap at Etsy). We printed several resized photos on a single 4x6 photo paper and managed to make tons of magnets for family! A hit!
Oh! And we made some candles. Yep, used the empty (and cleaned) baby jars of food to pour in the scented wax. Most of our family uses a warmer doodat so we didn't need to add a wick. It was a GREAT hit, too!
But the biggest hit of all was our family photo collage of the girls on an 8x8 piece of wood.

What I love most (and what family loved most) was A -the fact that it was homemade and B -that you could see the wood grains so it almost looked like the photo was actually painted on.
It really is pretty simple to make this. And very forgiving!! All the imperfections look like they were placed there on purpose. I loved that about this project!
And you can get real creative with this! We turned one of these into a clock! We just bought the clock pieces at WalMart. They can be found at any hobby store, though.
Supplies:
Wood -had hubby cut mine into 8x8's. Tip: use LIGHT colored wood. The darker the wood, the harder it will be to see some parts of your photo. It will get lost... I ended up with darker colored wood and hubby ended up bleaching it for me to lighten it because my girls faces were not very clear. If you want to know the process hubby used to bleach my wood, lemme know. That'd be a whole other blog post!
Sandpaper -300 grit and 150 grit
Paint -I used acrylic paints
Your photo of choice resized to fit your wood piece. You can digiscrap a neat layout and use it, too! Totally go crazy! I used PhotoShop to design my prints.
Wipe-on Poly
T-Shirt transfer paper
Iron
Wax paper
Mod Podge (I used gloss)
Well ventilated room
Saw-tooth Hangers (for the back)
Instructions:
- Cut your wood to size you want, sand it with the 150 grit sandpaper. Make sure to sand the side you want to place your photo on nice and smooth. Make sure to also sand the edges nice and smooth! I didn't sand the back. I don't think it's absolutely necessary.
- VERY important: Mirror the photo you want to print. If you don't, any words you have on your photo, collage, etc. will not be legible!
- Print your photo onto the T-shirt transfer paper.
- Heat your iron to high. No water in the iron!!
- Set the transfer paper down on the piece of wood the way you'd like it to appear. You can trim the paper if it's too big, but if you can, leave a little bit of the paper hanging over the edge of the piece of wood so you have somewhere to lift it off when it comes time to peel.
- Take your wax paper and set it on top of the T-shirt transfer paper. If your iron gets as hot as mine, this will protect it from burning right through!
- Place your iron on the center of the paper and work your way out towards the corners. Make sure to press down on the iron real hard. Go in a circular motion. Be sure to get the edges real well. Hubby helped with this. He's strong =D
- Once this is done, start peeling it away SLOWLY. Start at a corner. Now, I have tried this both while the transfer paper was hot and once it has cooled. I have noticed that if you start peeling it off slowly while it is hot, you still have a chance to correct it if a part of the image did not transfer properly. And I have noticed that you get a lot less sticky glue-y stuff on your photo if you peel it while it's still hot. When we worked with it when it had cooled, it seemed a bit trickier to peel and a lot more of the glue-y part of the transfer paper remained on the photo. If this does happen, though, you can wait till it's completely cooled off and then sand it with the 300 grit sand paper.
- Once you have successfully removed the transfer paper, let it cool completely.
- Grab your paints and paint the edges and sides if you wish.
- Grab your mod podge and put a thin coat of it over the whole thing. This will ensure that your transfer stays and doesn't peel off.
- Let it dry completely.
- Gently sand it with the 300 grit sandpaper, so it is nice and smooth.
- Clean off any dust particles.
- In a well ventilated room, apply a layer of wipe-on poly with a foam brush. Tip: Set your wood-art on top of a wax sheet of paper. It will be easy to lift off of and won't stick as it did to my table -oops! The things you learn the hard way lol (ALTERNATIVE IDEA: instead of using poly, you can also just mod podge it in Matte or Gloss and be done!)
- When it is completely dry, sand it lightly with the 300 grit sandpaper.
- Apply another layer of wipe-on poly, sand, repeat at least 3 times. You can repeat this process as many times as you'd like, though. Until you are happy with the result!
- Adhere to the back a a saw-tooth hanger and voila! You are done!
Subscribe to:
Posts (Atom)