Showing posts with label projects. Show all posts

Tuesday, April 19, 2011

Sesame Street Birthday Party Prep

I cut the following using my Silhouette SD!  Can't wait to see how it all comes together at the party!

Wednesday, December 1, 2010

Stocking Holder

Using my Silhouette SD
click photo to enlarge

Thursday, October 7, 2010

Halloween Costume

So my daughter comes to me and says to me that she finally knows what she wants to be for Halloween!  She would like to be --wait for it-- a Fairy Princess Kitty-Cat.  

Right.  Suuurrre.  Not a problem, kid!  Do they even sell such a costume???   Mmmhmmm  Sure, they do!  Right next to the Ninja Fairy Dinosaur costume. 

Sooo I decided to tackle this one myself.  My daughter is VERY into dress-up clothes, so all previous Halloween costumes end up becoming a regular dress-up clothes after, so I never felt bad about buying her costume.  I knew she'd make great use of it.  In fact, the actual kitty costume we got her three years back is still worn to this day!  Granted, the tutu is teeny on her -she must wear pants under!! and the tail is kinda shaggy.. but it is oh so loved!  So I figured if I did come up with something, I had to make sure it would last and perhaps even be an upgrade to her itty bitty kitty costume.

So we started out with a pettiskirt that we have.  Then I found an old garage sale shirt that we got her last year.  It had a slight stain, but I could work with it and get it covered.  And then my daughter remembered she had a leopard print tights.  Granted, they are three sizes too small but she was so excited about them that I told her I'd make it work -somehow.

So off to Hobby Lobby I went to find some supplies to help me.  I got some marabou, some felt fabric that had hot pink leopard print on it and some faux fur fabric with leopard print.  I priced ribbons at Hobby Lobby and noticed that RABOM had more ribbon quanity for less money PLUS they had free shipping that weekend, so I ordered some leopard print ribbons in pink and ivory, some hot pink sheer ribbon, and brown satin ribbon.  I also added a foam headband to my cart and a plastic headband since I wasn't sure which one I'd like best to use for the ears. 

When all the supplies arrived, I got to work!  I ended up using the foam headband.  I covered it with the brown satin ribbon, using the glue gun to adhere it.  I then cut out the faux fur into triangle pieces, inserted floral wire in the ear and then glued it shut.  The floral wire helped me shape the ears.  I then attached the ears to the back of the satin covered ribbon and voila!  I also added a touch of marabou between the ears.  Sooo cute!  My daughter is in love with the ears!!!

The shirt was pretty easy, too.  I cut out the hot pink leopard felt fabric and added an itty bitty bit of hot glue around the edge of the fabric and glued it to the shirt.  I added some wax paper in between the shirt before attempting to glue the fabric on.  I was afraid I'd end up gluing the back and front of the shirt together LOL now, that wouldn't be such a good thing to have happen, eh?

I added some marabou to the cuff of the shirt and around the neck.   It looked so darling!!!   We also ended up sewing the marabou tail to the back of the shirt.  Since she wasn't wearing it tucked it, it worked well.  Plus, then we didn't have to ruin our pretty pettiskirt and it could be reused without the kitty attire.  I used embroidery floss and hand sewed the marabou to the shirt.  Really easy!

Now what's a Fairy Princess Kitty-Cat without a magic wand??  My girl had painted a wooden star wand a loong time ago.  I had her dig it up and got her permission to alter it to match her new costume.  She totally agreed!  I painted the stick portion brown and the star pink.  Then I traced the star on the hot pink leopard print fabric twice, cut the fabric and then sprayed it with my Elmer's multi-purpose spray adhesive.  I love that it allowed for repositioning it!  I got it just right after a couple of tries and it was perfect!!   Then I tied several ribbons around it, added also tulle to it and put a dab of hot glue to ensure the ribbon and tulle don't come off!  A Fairy Princess Kitty-Cat does a lot of magic and we wouldn't want that wand coming apart!!

Now to tackle the too small tights.  I cut off the feet and top portion..  I then hemmed the bottom and tops of both and voila!  I now had leopard print leggings.   Sooo cute!   So there ya have it:


Now the final touch would be the wings!  Which is not depicted in the picture, but I can assure you that her pink set of wings from LAST year's fairy costume matches perfectly and she will be wearing that along with the costume I made her :)  Sooo soooo cute!!   My girl absolutely adores her Fairy Princess Kitty-Cat costume and that is all that matters to me!!

Sunday, August 29, 2010

Cupcake Stand

Ok, so it isn't the fanciest thing on the block, but I wanted to use supplies I already had on hand.  Call me frugal but there was a budget and I was sticking to it!  Birthday parties can get mighty costly if you aren't careful...   The only thing I bought to put this together was the scrapbook paper which cost 65 cents a piece and I got four sheets.  Not bad, huh? :)


I had some foam board lying around from when we had our garage sale, so I had those cut into squares.  Big, medium and small.  Simple!  Got the scrapbook paper I wanted and then looked around my stash of empty containers.  Yes, I save containers.  They are great to store kid's stuff and can be used for all kinds of artsy crafty stuff.  Case in point!  So anyway, I wanted something tall because I didn't want the cupcake toppers I made to be smooshed down in the cupcake.  So I chose my empty Gerber Puffs container. 

I was initially going to wrap the container with red satin ribbon, however it was too much red and I decided I liked how it looked as plain white and it had a really nice shape to it.  Easy peasy!

I used hot glue gun to attach the containers to the foam board (make sure to first glue your scrap paper to the foam board before attaching the container!  I used my daughter's gluestick because it didn't leave any bumps and it was nice and smooth when dried), however it wasn't very stable so here is where my dear hubby comes in:

He screwd the caps in to the foam board giving me peace of mind that cupcakes won't be raining down on the table during the party!  And it held up REALLY well!  (thanks hubby for helping!!!)  I should also mention that I glued the lids to the containers, too.

Notice the pencil marks on the foam board?  The arrow?  I made sure to add arrows under each foam board piece so I'd know which side it was facing.  Because I added some ribbon around the foam board, I wanted to make sure I aligned all of the pieces properly and the extra overlapped ribbon in the back was not noticed by anyone.  Hope that makes sense!

So here ya have it:

I took a small gift box I had saved from Christmas, covered it with light green tissue paper and put the cupcake stand on top of it.  I loved how it was the centerpiece of the table and how it stood out nice and tall!

After the party I took it apart (with the hubby's help!) and saved it.  I can always buy new scrapbook paper and re-assemble it for another party!

Frugal, easy and I think it looked cute!

Saturday, August 28, 2010

Some questions answered

I received an email asking about the goodies in my daughter's birthday party.  Yes, I did bake just about everything you see there.  The hubby gets credit for the ladybug chocolates, though.  He had the patience to do those candy mold doodats.  I just kept giving the ladybugs a black eye LOL 

It took TWO HOURS to dip the pretzels in red and dark chocolate..  my hands were cramping up but they were sooo good and so worth it!!

The lovely 3D ladybug cake topper is from the wonderful Julie over at Cakes and Kids.  She is so awesome to work with!! 

The birthday cake is from scratch and it's a homemade strawberry flavored cake (daughter requested flavor).  May not look purty but it was YUMMY!  And there was not a slice left by the time the party ended. 

I did cheat on the cupcakes..  that's a butter recipe cake mix, however the chocolate ganache on top I did make.  Hubby added a wee bit of Irish creme liqour and it was sooooooooo good!!

Also made the yummy cake pops and dipped them in red candy melt and then added some black sprinkles.

Hubby makes a divine punch!!  I'll have to find the recipe for that and share it.  It is SOOO good!  It was originally a recipe I found online but he has altered it so much that it's nothing like the original I found.  It is GOOD!

The decor...  yes, I made the cupcake stand.  Also designed and printed the birthday banner.  You can't quite see it clearly from the pics, but it's got cute little ladybugs flitting around the letters.  Designed the cupcake toppers, labels, etc.  Also punched out some black dots using my Friskars 1 inch squeeze punch and then just sprinkled it all over the red tablecloth.  Super easy and cute!

Can't think of anything else, but feel free to email me with any questions!  (...baby's crying so gotta run!)

Saturday, August 14, 2010

The Party

Exhausted beyond belief!  But it was a big hit :)


Wednesday, August 11, 2010

Monday, July 19, 2010

Friday, June 4, 2010

Whatcha up to, Cupcake?

Cupcakes and more cupcakes!  That's what I've been up to!  Whew... thank goodness it's over!  Although, now that my girls turned one it makes me miss all those itty bitty newborn moments...  sigh.

So you wanna see what I did for their birthday?  Feast your eyes on the PINK Cupcake themed birthday party!


Yes, everything you see on that table was made by moi!  I made the cupcakes, the vanilla-pink and chocolate covered pretzels, the strawberry-fudge cake-ball pops dipped in vanilla chocolate and covered with sprinkles!  And I even made the cute pails to hold the cake-ball pops!  (more on how I made the pails below!)

My Cupcake Birthday Cake.  Yes, I did make it!  With the help of hubby, of course ;)  Hubby made the chocolate liner... isn't it awesome looking??  ALL edible!
and the cuppy-cakes, of course:


Yes, I did design and print and punch out those adorable cupcake-toppers on the cupcakes!  You can download the cupcake toppers here.  Please remember they are for personal use only (not for resale or commercial use!  The cupcake image was found online for personal use.) And I used Friskars Squeeze-Punch -XL Seal of Approval.

...............and what's a party without SMASH cakes?  Or better yet!!!  Cupcake Smash Cakes!

kept their smash cakes simple!  just yellow cake and vanilla frosting.  first time they had sugar!  and boy are they not getting anymore sweets for a good loooong time!  they were SO crabby and on a total googley-eyed sweet-overload state for several hours!


It was OH so fun!!  Especially the cleaning up after lol

And the cute pails...  oh, how I love the pails!!  Lemme show you how I got them to hold the cake-ball pops in place.

First you'll need:

pails  (Target had these on sale!!)
tissue paper (color of your choice)
styrofoam
tulle
scissors

My styrofoam was huge so I grabbed a large shopping bag and set it at my feet and placed the styrofoam in and cut it up into rectangle pieces.  It's VERY messy when you cut, hence the shopping bag to catch the mess.

One I had the shapes I wanted cut up, I covered it with my tissue paper (pink in this case) and set it aside.

I cut up some tulle -about 22 inches long.  2 strips for each pail.   I set them on the table one strip over the other but in a cross.    North to South and West to East position, if that makes any sense.

Then I set my styrofoam covered in tissue paper right in the center, the ends of the tissue paper down.  Then pick it up, tulle and all and set it right in the pail like so:

and tuck the ends of the tulle gently inside as much or as little as you want so it looks like this:

and there you have it!  The pops will now stay in place when you stick'em in your cute pails.  :)

{click pic to enlarge!}

Tuesday, May 4, 2010

Picture Perfect Gift Ideas

This past holiday season hubby and I decided to make most of our gifts to the family.  Yes, we were trying to be frugal but also we wanted to give family something more of a keepsake that was handmade with love. (insert: awwww)

We made several gifts and even got our daughter involved.  We printed out 8.5x11 calendars that I plopped photos in a ready made template (purchased at a digistore online) and then laminated it.  We took it to our nearest home office store and they bound it for a grand total of 4 buckeroos!  It was an absolute hit!!  In fact, the guys in the family requested an extra one for their office at work.


My daughter and I worked on magnets.  We used bottle caps, a hole punch, E6000, some crystal lacquer and neodymium rare earth magnets (got tons of these for uber cheap at Etsy).  We printed several resized photos on a single 4x6 photo paper and managed to make tons of magnets for family!  A hit!

Oh!  And we made some candles.  Yep, used the empty (and cleaned) baby jars of food to pour in the scented wax.  Most of our family uses a warmer doodat so we didn't need to add a wick.  It was a GREAT hit, too!

But the biggest hit of all was our family photo collage of the girls on an 8x8 piece of wood.

This was fun to make but I do not recommend doing this in the winter time if you do not have a heated garage!  The poly stuff stinks and due to being cold out, it took forever and a year to dry.  We ended up enclosing it inside a cabinet, draped a sheet over it and placed a space heater under the sheet to keep it warm enough to dry.  No worries!  Hubby set up his web cam in the garage so we could keep an eye on it!  No fires, promise!

What I love most (and what family loved most) was A -the fact that it was homemade and B -that you could see the wood grains so it almost looked like the photo was actually painted on. 

It really is pretty simple to make this.  And very forgiving!!  All the imperfections look like they were placed there on purpose.  I loved that about this project!

And you can get real creative with this!  We turned one of these into a clock!  We just bought the clock pieces at WalMart.  They can be found at any hobby store, though.

Supplies:

Wood -had hubby cut mine into 8x8's.  Tip:  use LIGHT colored wood.  The darker the wood, the harder it will be to see some parts of your photo.  It will get lost...  I ended up with darker colored wood and hubby ended up bleaching it for me to lighten it because my girls faces were not very clear. If you want to know the process hubby used to bleach my wood, lemme know.  That'd be a whole other blog post!

Sandpaper -300 grit and 150 grit

Paint -I used acrylic paints

Your photo of choice resized to fit your wood piece.  You can digiscrap a neat layout and use it, too!  Totally go crazy!  I used PhotoShop to design my prints.

Wipe-on Poly

T-Shirt transfer paper

Iron

Wax paper

Mod Podge (I used gloss)

Well ventilated room

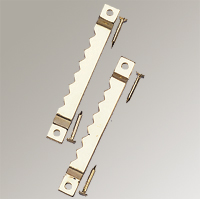
Saw-tooth Hangers (for the back)


Instructions:
  • Cut your wood to size you want, sand it with the 150 grit sandpaper.  Make sure to sand the side you want to place your photo on nice and smooth.  Make sure to also sand the edges nice and smooth!  I didn't sand the back.  I don't think it's absolutely necessary.
  • VERY important:  Mirror the photo you want to print.  If you don't, any words you have on your photo, collage, etc. will not be legible! 
  • Print your photo onto the T-shirt transfer paper. 
  • Heat your iron to high.  No water in the iron!!
  • Set the transfer paper down on the piece of wood the way you'd like it to appear.  You can trim the paper if it's too big, but if you can, leave a little bit of the paper hanging over the edge of the piece of wood so you have somewhere to lift it off when it comes time to peel.
  • Take your wax paper and set it on top of the T-shirt transfer paper.  If your iron gets as hot as mine, this will protect it from burning right through!
  • Place your iron on the center of the paper and work your way out towards the corners.  Make sure to press down on the iron real hard.  Go in a circular motion.  Be sure to get the edges real well.  Hubby helped with this.  He's strong   =D
  • Once this is done, start peeling it away SLOWLY.  Start at a corner.  Now, I have tried this both while the transfer paper was hot and once it has cooled.  I have noticed that if you start peeling it off slowly while it is hot, you still have a chance to correct it if a part of the image did not transfer properly.  And I have noticed that you get a lot less sticky glue-y stuff on your photo if you peel it while it's still hot.  When we worked with it when it had cooled, it seemed a bit trickier to peel and a lot more of the glue-y part of the transfer paper remained on the photo.  If this does happen, though, you can wait till it's completely cooled off and then sand it with the 300 grit sand paper.
  • Once you have successfully removed the transfer paper, let it cool completely.
  • Grab your paints and paint the edges and sides if you wish.
  • Grab your mod podge and put a thin coat of it over the whole thing.  This will ensure that your transfer stays and doesn't peel off. 
  • Let it dry completely.
  • Gently sand it with the 300 grit sandpaper, so it is nice and smooth.
  • Clean off any dust particles.
  • In a well ventilated room, apply a layer of wipe-on poly with a foam brush.  Tip:  Set your wood-art on top of a wax sheet of paper.  It will be easy to lift off of and won't stick as it did to my table -oops!  The things you learn the hard way lol   (ALTERNATIVE IDEA:  instead of using poly, you can also just mod podge it in Matte or Gloss and be done!)
  • When it is completely dry, sand it lightly with the 300 grit sandpaper.
  • Apply another layer of wipe-on poly, sand, repeat at least 3 times.  You can repeat this process as many times as you'd like, though.  Until you are happy with the result!
  • Adhere to the back a a saw-tooth hanger and voila!  You are done!
Good luck and have fun trying this!  We messed up many in the process of trying to get it figured out and looking the way we wanted it too.  I don't think there's a right or wrong way to do this.  This is just how we ended up doing it and were very pleased with the end result!  If you have tried this and have an awesome tip, please share!!

Sunday, April 11, 2010

Lamp Transformation & Details

I've been doing tons of reading on other blogs about how one can transform SO much for SO little!  I love thrifty DIY projects, however, it still usually involves some $$ and so I haven't really done a lot of DIY stuff. 

However, this lamp transformation only cost me $3.48!  Mostly because the lamp was a hand-me-down (read: free!) and the paint I already had from eons ago and no clue how much that cost me at the time and so the only thing I bought was plain white fabric that was on sale at WalMart. 

Now, bear in mind that this is my first attempt at redoing a lampshade so it isn't perfect!  I now know I need to pull the material around the lampshade tighter so it looks better and I learned some other stuff along the way.  When MIL saw the transformed lamp, she asked if I would do one for her, so that made me feel good! 

The lamp I transformed was for the bathroom.  Go ahead and laugh...  why do you need a lamp in the bathroom, you ask?  No, it's not for hubby to read his magazines there...  lol  it's because I wanted some softer light in there when I am relaxing in the tub! 

So here is the before pic of the lamp:

and here is a closeup..  it's actually not a bad looking lamp.  Just didn't work with what I have going on in the bathroom:

and here's the paint I used:

I absolutely LOVE LOVE the Folkart Metallic Pearl White color!  I started out with the Americana Buttermilk color.  I need about 2.5 coats to truly cover the whole base of the lamp.  Once I had it covered completely, I noticed it was way too yellow-ee.  Sooo that is where my lovely gorgeous Metallic Pearl White paint came in.  I did maybe a coat and a half... it really didn't need much and it left it with such a gorgeous opulent pearly color.  It reminded me a lot of the paint Kate used.  Here is a closeup of what it looked like:

I liked that it wasn't totally white.. it had a creamy look to it.  Which, of course, now leads me to believe that I can do this with a pink base under for a project for my daughter or any other color for that matter!  It's just got such a cool look to it!!

So here is the whole lamp:

Whatcha think??  I sewed the ruffle trim piece...  it isn't 'perfect' but I like that it looks frayed a bit and love the imperfections. 

Here's a side-by-side before and after photo:

And since I am talking about the bathroom...  here are a few more details I added to the bathroom.  You can see the big transformation/redo here.

The top and bottom of the cabinet didn't come out as smooth as I'd liked, so easy peasy solution.  I added a velvet buttercream trim to it.  Used my trusty'ol glue gun and voila:

I've actually had someone ask me what paint color it was..  yah, I am still shaking my head in amazement over that one, but hey, if they think I painted a straight line like that, yay for me! lol

I had some leftover velvet trim so I added it around the vase:

Those cute card that I cut out and laminated are from livinglocurto.  It really does help my girl remember what all to do in the morning!

I think that is all I have for now!  I am liking how my bathroom is coming together..  I still have a few more small projects/details I'd like to add to the room.  Bit by bit, as money and time allows.  :)

Wednesday, March 31, 2010

My Private Escape

We've been so entirely busy these last couple of weeks!  We redid our bathroom!! 

Well, we didn't do all of it ourselves.  We had contractors install the new whirlpool tub (squeal!) and hubby did the electrical part and we redid the rest ourselves!

Wanna see what it looked like before we bought the house??  Please don't puke.  It is pretty nasty!

and a close-up of the tub:

Since we moved when I was pregnant, I just tried to decorate it as best I could with whatever colors were already there:


And after a long couple of weeks...  welcome to my private escape!!!

(Shower curtain coming soon lol  still haven't decided what I would like... )

and

I absolutely lurve lurve the color!!  The photos just do not do it justice!  It's called Soothing Aloe and is by Dutch Boy.  Just gorgeous! 

We decided to eventually replace all our cabinets (finances wouldn't allow it right now :( ) so we just got new hardware and I painted the cabinets above the toilet to white so it wasn't so brown.  I was so tired of seeing brown!!

And you want to know a secret???   We did not remove the fugly tanish brown tiles from the walls!!  We used cement adhesive and just put the beaded wainscoting right over it!  Voila!  Easy peasy! 

Still want to replace the light fixture, get a new mirror and some crown molding but all in good time!!  For now, I have my bathroom back and the icky nasty window is gone so no more water damage and mildew!  Yay for a private relaxing escape!!! :)

Friday, March 12, 2010

Changing Pad Cover

I love my SafeFit changing pad for my little ones.  However, what I absolutely hate is having to put it back in my diaper bag after using it on a changing station in a public restroom.  Who knows how many icky germs are on those tables!?  And I would be putting it right in my diaper bag!!!  *shudder*

Soooo  I quickly put together a cover for it!  One that I can wash when I get home and keeps all those icky germs from touching my stuff in the bottomless pit I call a diaper bag.

Voila:

and

easy peasy to make and only took about 10 minutes.  :)  It ain't fancy but gets the job done!

Thursday, March 11, 2010

Reading Nook Project

Thanks to two amazing and innovative bloggers, I was able to come up with this:

The shelves are actually rain gutters!  I got the idea from Raising Olives.  And I've been wanting some vinyl word art but, alas, finances have not made it possible..  so when I ran across thee most wonderful Thirfty Decor Chick, I decided to give it a go myself!  And... voila!  As you can see, we now have a lovely little reading nook.  Been wanting one for my girls for some time and I think it turned out pretty good, if I do say so myself!

I also put together this pillow for my girls:


I took apart two old couch throw pillows and sewed a new cover using scraps of material I had.  I didn't have enough of just one material so I decided to use three!  Stuffed it with some extra stuffing I had and decided to close it in a not so traditional way. 

My goal is to try and figure out a way to add a reading lamp or some sort of extra light for the nook.  Will have to give that some thought.